Wednesday, 24 December 2014

Happy Christmas!


So, I am currently writing this drinking Bailey's on ice and thinking about wrapping the last few presents before Father Christmas arrives tomorrow night. Christmas is the best time of the year. Ideally, it would be drawn out for another four weeks in order for me to actually have time to bake and cook everything in my head. 
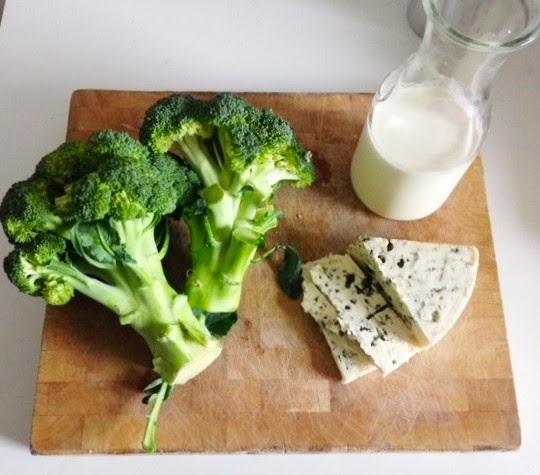
Although it is a time for gluttony and decadence, in the run up to Christmas I actually like to eat as fresh as possible. That's why below I have included the recipe for a really quick dish I made for dinner this week. A white bean stew with spinach, mint and aubergine. Warming but fresh and a nice rest for the tummy from the stodge. It also works very well with left over Turkey thrown in for a post christmas dinner. 
I'm back in the Peak District this week, in actual fact, I've been here for nearly a week now. The annual visit to nearby Chatsworth house was exquisite and wouldn't be complete without a mince pie and a stop by the award-winning farm shop. 
I've been doing a lot of dog walking, visiting friends and family and getting some rest in before a hectic new year. 
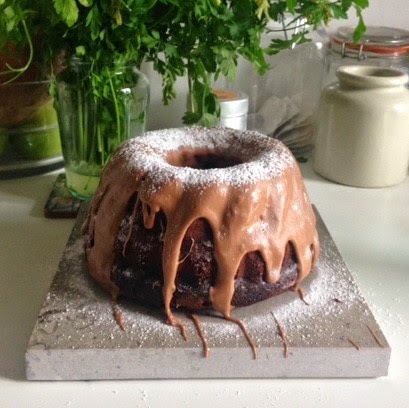
I'm going to be part of a family team tackling the Christmas dinner this year. The course I have been designated is the pudding. In my opinion, the most difficult, but the best course. I've been weighing up a few options as people often don't feel the need for pudding after a huge christmas dinner. I will let you know how I get on and of course, I will do a post on the pudding I choose. 


Ingredients

1 tbsp olive oil
1 large white onion
2 crushed garlic cloves
200g of quinoa
600ml of chicken stock or water
1 can of butter beans
2 handfuls of spinach
1 small handful of mint leaves
1 lemon


 Method

Wash the quinoa is a fine sieve and place it in a pot with the stock, a pinch of salt and some ground black pepper. Bring to the boil and then turn down to a low heat and let this cook for around 10 minutes.
While this is cooking heat the olive oil in a pan on a medium heat, chop up the onion finely add a pinch of salt and cook for 5 minutes. Throw in the garlic for the last minute being careful not to burn it (nothing worse than burnt garlic).
Drain the quinoa if there is any excess water then, poor the onion mix into the quinoa and stir.
Wash the butter beans in a sieve and add into the quinoa with the spinach and a few tbsp of water. Cook for 10 minutes,, keep moving so that it doesn't burn on the bottom. 
Zest the lemon, finely chop the mint and throw these both plus the chilli flakes over the top and stir, then take it off the heat and serve.


Have a wonderful christmas & a happy new year!

Monday, 15 December 2014

Nigella's Peanut Butter & Chocolate Cheesecake.


Please excuse the look of this cheesecake. It may look a little rough around the edges, but believe me, what it lacks in beauty it more than makes up for in taste. 

Here at the Bravington Kitchen, things have been very hectic and festive. We had our house Christmas dinner last night and we may have indulged slightly (this is a complete lie, there's nothing 'slightly' about a four course dessert, a vomitoria was almost required). I've included some pictures of the festivities below for your enjoyment (or not). 

So, all this festive indulgence got me thinking about my favourite recipe for a Christmas treat. 
This peanut butter & chocolate cheesecake just hits the spot. Perfectly rich, indulgent and has that comforting claggy texture of something utterly naughty. The mixture of sour cream and chocolate in the topping is delicious as it is easy and covers a multitude of sins, if like me, you are impatient in taking it from the tin too soon and the top cracks. This recipe is from Nigella Lawson's Kitchen, one of my go-to cook books. 

My song of the week this week is the beautiful and talented Jessie Ware- Tough Love


Ingredients

for the base

  • 200 grams digestive biscuits
  • 50 grams salted peanuts
  • 100 grams dark chocolate chips
  • 50 grams soft unsalted butter

for the filling

  • 500 grams cream cheese
  • large eggs
  • large egg yolks
  • 200 grams caster sugar
  • 125 ml sour cream
  • 250 grams smooth peanut butter

for the topping

  • 250 ml sour cream
  • 100 grams milk chocolate chips
  • 30 grams soft light brown sugar


Method

  1. Preheat the oven to 170°C/gas mark 3/325°F.
  2. Then process the biscuits, peanuts, dark chocolate chips and butter for the base in a food processor.
  3. Once it comes together in a clump, turn it out into a 23cm / 9inch springform tin and press into the bottom and up the sides to make the crunchy crust.
  4. Put in the fridge while you make the filling.
  5. Process the filling in the cleaned or wiped-out processor bowl, putting in the cream cheese, eggs and egg yolks, sugar, sour cream and peanut butter and whizzing to a smooth mixture.
  6. Pour and scrape the filling into the base in the chilled springform tin and cook for 1 hour, though check after 50 minutes. The top – only – should feel set and dry.
  7. Take the cheesecake out of the oven while you make the topping.
  8. Warm the sour cream and chocolate with the brown sugar gently in a small saucepan over a low heat, whisking to blend in the chocolate as it melts, and then take off the heat.
  9. Spoon and spread the topping very gently over the top of the cheesecake, being as careful as you can in case you break the surface of the cheesecake. (not that anything bad will happen; you’ll just have chocolate marbling the cake a bit.)
  10. Put it in the oven for a final 10 minutes.
  11. Once out of the oven, let the cheesecake cool in its tin and then cover and put into the fridge overnight.
  12. When you are ready to eat the cheesecake, take it out of the fridge, just to take the chill off: this will make it easier to spring from the tin. don’t let it get too warm, though, as it will become a bit gooey and be hard to slice.

I took the finished one to work for the staff meeting, its such a crowd pleaser. I guarantee if you make it, it will be gone before you can save yourself a piece. 

Also, please let me know if you make anything form here, I love to see things you make so send me a picture. 
Follow me on social media here. Twitter instagram


Thursday, 27 November 2014

Rice Pudding


Rice pudding is made for winter. Nothing beats curling up with a bowl of the home made stuff, watching a movie on a Sunday. Its been known on occasion that sometimes I just have a big bowl of this for dinner, I'm not sure this is laziness or pure gluttony.  
Anyway, I made a big bowl of the stuff this week, and I can honestly say it was gone within hours. If you have never attempted to make home made rice pudding before, please do. Its so easy. It also tastes much, much better than the tinned variety, but lets be honest, that not too hard to do.  I cook my rice first in the milk, this is a technique dating back to the 1700's, I find it just makes it creamier.  The recipe is below, enjoy!

I also have to apologise for the lack of posts recently, I've been so busy juggling work, placement and university that I haven't had time to write everything up. I'm back on track now though and there will be a few posts this week to make up for my absence. 

As usual my song of the moment- http://youtu.be/pB-5XG-DbAA


Ingredients3 tablespoons caster sugar, plus extra to taste
120 g pudding rice
750 ml skimmed milk
250 ml single cream
1 stick cinnamon or 1 tsp ground cinnamon
1 vanilla pod or 1 tsp vanilla extract
Cornish clotted cream, to serve
fruit jam, to serve


Pre heat the oven to a medium heat.

Put the rice in a pan and pour in the milk, simmer until the rice is tender. Remember not to boil the rice as it burns and takes away the natural sweetness of the milk. 
Add the sugar, vanilla and cinnamon, then pour in the cream. If using a cinnamon stick take is out before pouring into a own proof dish. 
Bake in the oven for about 30 minutes, checking every 10 minuets or so. Make sure that the rice doesn't suck up all the liquid, if this does happen just add some more milk and stir. 
I was incredibly indulgent with mine, at the end I stirred through some Cornish clotted cream for that bit of extra decadence. Serve with a nice fruit jam, or alternatively, chocolate milk buttons. 


Sunday, 9 November 2014

Snickers Brownies & Remembrance Weekend


This weeks baking was a quick Sunday afternoon treat. Brownies are perfect, especially with a little something extra thrown in. I wanted to put something nutty in mine, so went to the shop and picked up some Snickers. The nutty, caramel flavour pairs perfectly with the a classic brownie recipe.  

It's also remembrance weekend in the UK this weekend, so I decided that I should go and see the poppies in the Tower of London before they went. I'm generally underwhelmed by most things, not that I don't appreciate things. The poppies were very poignant. It was actually a little overwhelming trying to imagine every single flower as a person. It was truly amazing. The middle picture is of the book market on the South Bank. It's such a nice spot. 

 Here is the link to my song of the week- http://youtu.be/VHrLPs3_1Fs

Ingredients:
200g Dark chocolate, chopped
2 Snickers bars
250g Butter
65g Plain flour
80g Cocoa powder
1tsp Baking powder
360g Caster sugar
3 eggs, beaten
1tsp vanilla extract 

Preheat the oven to 180°C and line a deep baking tray. 

Melt the butter and the chocolate in a large bowl, the microwave or over a bowl of water is fine. Set aside to cool for a few minutes while beating the eggs and weighing out the flower. Add the beaten egg to the chocolate and butter along with the vanilla extract. Stir in the sugar and beat for a few minutes. Then add the flour and baking powder followed by the chopped Snickers bars. I always save a few pieces to pop on the top.
Pour into the lined tin and bake for 50 minutes, keep an eye on it, as the pieces on the top can catch and burn, if this happens, just pop a sheet of baking paper over the top and finish cooking. 
Leave to cool on a wire rack and cut into pieces. 

Tuesday, 4 November 2014

Lemon Drizzle Biscuits


Two of my favourite things in this world are Lemon and Drizzle. If there is any lemon based treat I'm there. I will gladly reject puddings, treats and chocolate based goods if there is an option for a food that contains that tangy lemon sourness. 

For those of you that know me, you will know that I do not buy snacks to eat at home. No crisps, chocolates or biscuits. My philosophy is that if I really want something, I have to get off my behind and make it myself. My waist line is thankful that I'm quite lazy. 

I have to admit that these biscuits are a creation of a 'chuck it in and see what happens' moment brought on by sweet cravings. People went back for more though, so apparently they turned out all right. In my head while making these biscuits, I was thinking about a cookie that tasted like lemon drizzle cake, that's probably the closest description I can think of. 

I made mine in a food processor as its easier to wash up afterwards. 

Also please remember to let me know if you make any of my recipes, I love to hear from you. You can follow me on Twitter or on instagram


Ingredients 

1 Lemon (zested and juiced)
50 g Icing sugar
70 g Brown Sugar
120 g Butter (room temperature)
150 g Plain flour
1 Egg

For the Icing

100 g Icing Sugar
1 Lemon (zested and juiced)
1 tbls warm water


To start pre heat the oven to high heat, and line a baking tray. 

Add everything but the lemon zest and juice into a food processor (or bowl) and whisk together until it comes together in a cookie dough consistency. Add in the juice and zest of one lemon until combined. The perfect tool for dishing this out onto the baking tray is an ice cream scoop, if you don't have one, just use two spoons to make dough balls and place them evenly spaced onto the baking tray. I then pressed them down with the back of a spoon and baked in the oven for 10 minutes. 
Once they are starting to brown, pop them onto a wire rack to cool. At this stage I sprinkled them with more lemon juice and let it soak in
While the biscuits are cooling, add all of the Icing ingredients into a bowl and mix well. Once the biscuits are cool to touch, drizzle over the icing. A handy tip when doing this is to hold the wire rack over the sink and drizzle the icing on there, as it will drip through the rack onto the work surface creating a mess.

Enjoy! 

Sunday, 2 November 2014

Sunday Broccoli & Blue Cheese Soup


This week has been such a busy one, hence the lack of posting until today. I've just started a new placement as part of my university course in a psychiatric rehabilitation centre, so it's been a bit full on. I've spent most of the week following my educator around in a bit of a daze, trying to get my head around a new environment. This week I also attended a Halloween party at work, needless to say there was a lot of Tequila and dancing to thriller going on. (I'm still getting flash backs now) 

This is however, my first weekend off in a long time, so I thought what a better way to spend an Autumn weekend cooking and recovering from Halloween (the two day hangovers have arrived). I took a trip to the local farmer's market and brought some lovely blue cheese from a farm in Kent. You don't have to go a farmer's market, or Kent for that matter, any blue cheese will do. I just prefer a slightly milder one and was too lazy to walk to the super market. 

This soup is so tasty, I think it even rivals my dad's version. It took less than half an hour to make and is all done in one pot.

I want to let you all know that while I was making this soup, I was listening to this - My Song of the Week 

Ingredients

2  Large heads of broccoli
3  Cloves of garlic
200 ml Stock 
150 g Blue cheese
100 ml Double cream
2 tbls Olive oil
Salt & Pepper to taste


Start by heating the oil in a large heavy based pan, throw in the garlic cloves and leave to infuse for a minute or two. Chop the broccoli into medium pieces and put into the pan, adding the stock, salt and pepper. Leave to cook until the broccoli is tender. Scoop the broccoli into a blender, or alternatively, use a hand held blender to liquidise. Add the cream and cheese while blending. I always add a small amount of cheese at a time so that it's not over powering. Keep tasting as you're going, you may want to add more salt, pepper or cheese. 


Wednesday, 22 October 2014

Lemon Basil Shortbread


So this week was my last at university before starting placement until Christmas, accordingly we went to the pub to celebrate and the planned apple creation that was supposed to happen yesterday did not. Sorry world apple day, I let you down. I was to busy drinking this marvellous mulled cider, its funny how the first of the year always tasted so good.   
So after a busy week I thought it was time for a quick post before heading back up north for the weekend. I love shortbread. Its so easy, mostly three ingredients and can be done start to finish in 20 minuets. 
I like to add different things in with mine, lemon zest is always a winner. You can add anything really, thyme, chocolate, nuts, lavender & honey or even peanut butter. 
I chose to add Lemon Basil to mine as I found some growing in a container at work today, I didn't even know it was there until a customer asked what it was and I had to pretend to be a botanical expert convincingly. 
Its a really lovely herb, its flexible, so can go into sweet or savoury dish. It tastes as you would imagine, lemony and basily. Please don't worry if you can't find Lemon Basil, I'm not sure how widely available it is. You can use lemon zest and a few sprigs of ordinary basil as a substitute. 
I have included some pictures above of some seasonal things I've found this week. Well, its a picture of some leaves and a cup of mulled cider, I'm working on a alcohol free recipe for my pregnant sister in law (why else would you have alcohol free anything??) 

My song of the week is Laura Marling- New romantic

Lemon Basil Shortbread


Ingredients

200 g Plain flour
50 g Caster sugar
125 g Slightly salted butter, plus extra for the top
1 Small bunch of lemon Basil


Pre heat the oven on a medium heat.
Put the flour and the butter into a bowl, and rub together to from a crumb like texture. Add the caster sugar and the lemon basil leaves and mix thoroughly. You should be able to squeeze the bread crumb texture together to from a ball of dough, if its too sticky add some flour or if its too dry rub in some more butter. 
transfer the breadcrumb like dough into a baking tin and press down with the back of a spoon. You should see that the mixture firms up when doing this, make sure you get close to the edges as possible and really press it down firmly. 
Score the cutting pattern and sprinkle with the rest of the caster sugar. Bake in a medium oven for 15 minutes. 
Leave to cool on a wire rack and enjoy slightly warm.


Wednesday, 15 October 2014

Autumn Chocolate Cake


Have I said how much I love Autumn yet? This week was cold enough to wear my knitted roll neck jumper. (yay)

So, as this week has been the first proper week of Autumnal weather in London I decided to be brave and attempt to make a cake. I'm not brilliant at making cakes. I think it has something to do with being the polar opposite of precise. I just don't have the patience to be exact when baking and it is so often why my cakes fail. When baking a cake, you need precision, discipline and a good oven. I don't have any of those. 

This is why it is perfect for me, its based on a recipe by a lady called Jestei on Food52 (one of my favourite websites). I changed it quite a lot from Jestei's recipe, adding Earl Grey and Vanilla as flavours. I also made the icing with melted chocolate, icing sugar and olive oil. Chocolate and olive oil really work well together, so please don't knock it until you've tried it. Its one of my favourite flavour combinations, along with chocolate and earl grey. 

The baking tin I used was a fancy one I found while out shopping (in Aldi). I was completely over excited when they were selling them off in the bargain isle and brought several different ones. I was originally going to make a sweat bread in it after watching the Bake off final last week, but thought it might make a cake look a little less ordinary, so if you don't have to have a fancy tin to hand, a normal one will suffice. 

My song of the week, is really a song for every week, but its a good baking soundtrack....Flawless

Ingredients

6 Large eggs, separated
190 g Cocoa powder
200g Sugar
180g Butter
200g Good quality dark chocolate (use dark chocolate in cooking as it give it a stronger chocolate taste)
1 tsp Sea salt
1tsp Earl grey tea leaves or 1 bag (optional)
1 tsp Vanilla essence

For the icing
200g Icing sugar
50g chocolate
1 table soon of good quality olive oil


Melt the chocolate and butter in a pan on a low heat. Once melted together, leave to one side to cool. Whisk the egg whites in a clean large bowl, you can do this with a hand mixer to save time, whisk until firm peaks are formed. 
Transfer the chocolate mixture into large bowl and add the egg yolks, add the sugar and the vanilla essence. Boil the kettle and brew the tea in a cup of half full water, if using leaves you will have to strain before adding to the mixture, set aside for a few moments to cool otherwise you will cook the egg yolks. 
Add the cocoa powder to the chocolate mixture and the sea salt. Once the tea has cooled slightly add to the chocolate mixture. Fold in the egg whites with a metal spoon. At this point the mixture should be batter like, if it needs to be firmer add more cocoa power or if you like you can add a table spoon or two of flour. 
Pour into a greased baking tin and cook on a medium heat for around 30 minutes. The top of the cake should be crisp, timing is key with this as you still want it soft in the middle, but cooked enough so its not raw. Over cooking this would be a massive mistake, you need to look for something not to dissimilar from a brownie. 
Once its out of the oven, leave to cool completely on a wire rack. This is when you can make the topping.
Melt together the olive oil and the chocolate, mix in the icing sugar. Once the cake is cook completely pour over the top and let it dip down the sides. I chose to add a dusting of icing sugar on the top. 

Enjoy and please let me know if you do try any of my recipes, I love hearing from you guys!